blur

blur
Showing posts with label pictures. Show all posts

Monday, 14 September 2015

the fun with turmeric continues - dyeing & SCIENCE!???!

     i had posted that i had inadvertently discovered that turmeric mixed with washing soda turns a bright red colour!  i had done a little experiment to figure it out by rubbing a piece of wet cloth with turmeric and then sprinkling it with washing soda on the left, baking soda in the middle and alum on the right.  (i did this because i had originally discovered this when i sprinkled it on some cloth that i had previously sprinkled all 3 and didnt know which one had caused the colour change)


     the washing soda turned bright red instantly!  the baking soda had a slight colour change after a few min, and the alum did nothing.
     well, i left the house and when i came back i was surprised to find that where the baking soda had been was now also very red!  i didnt have my camera with me at that time so i was not able to get a picture until the next day when the fabric had fully dried and the colours had faded a bit at that time.


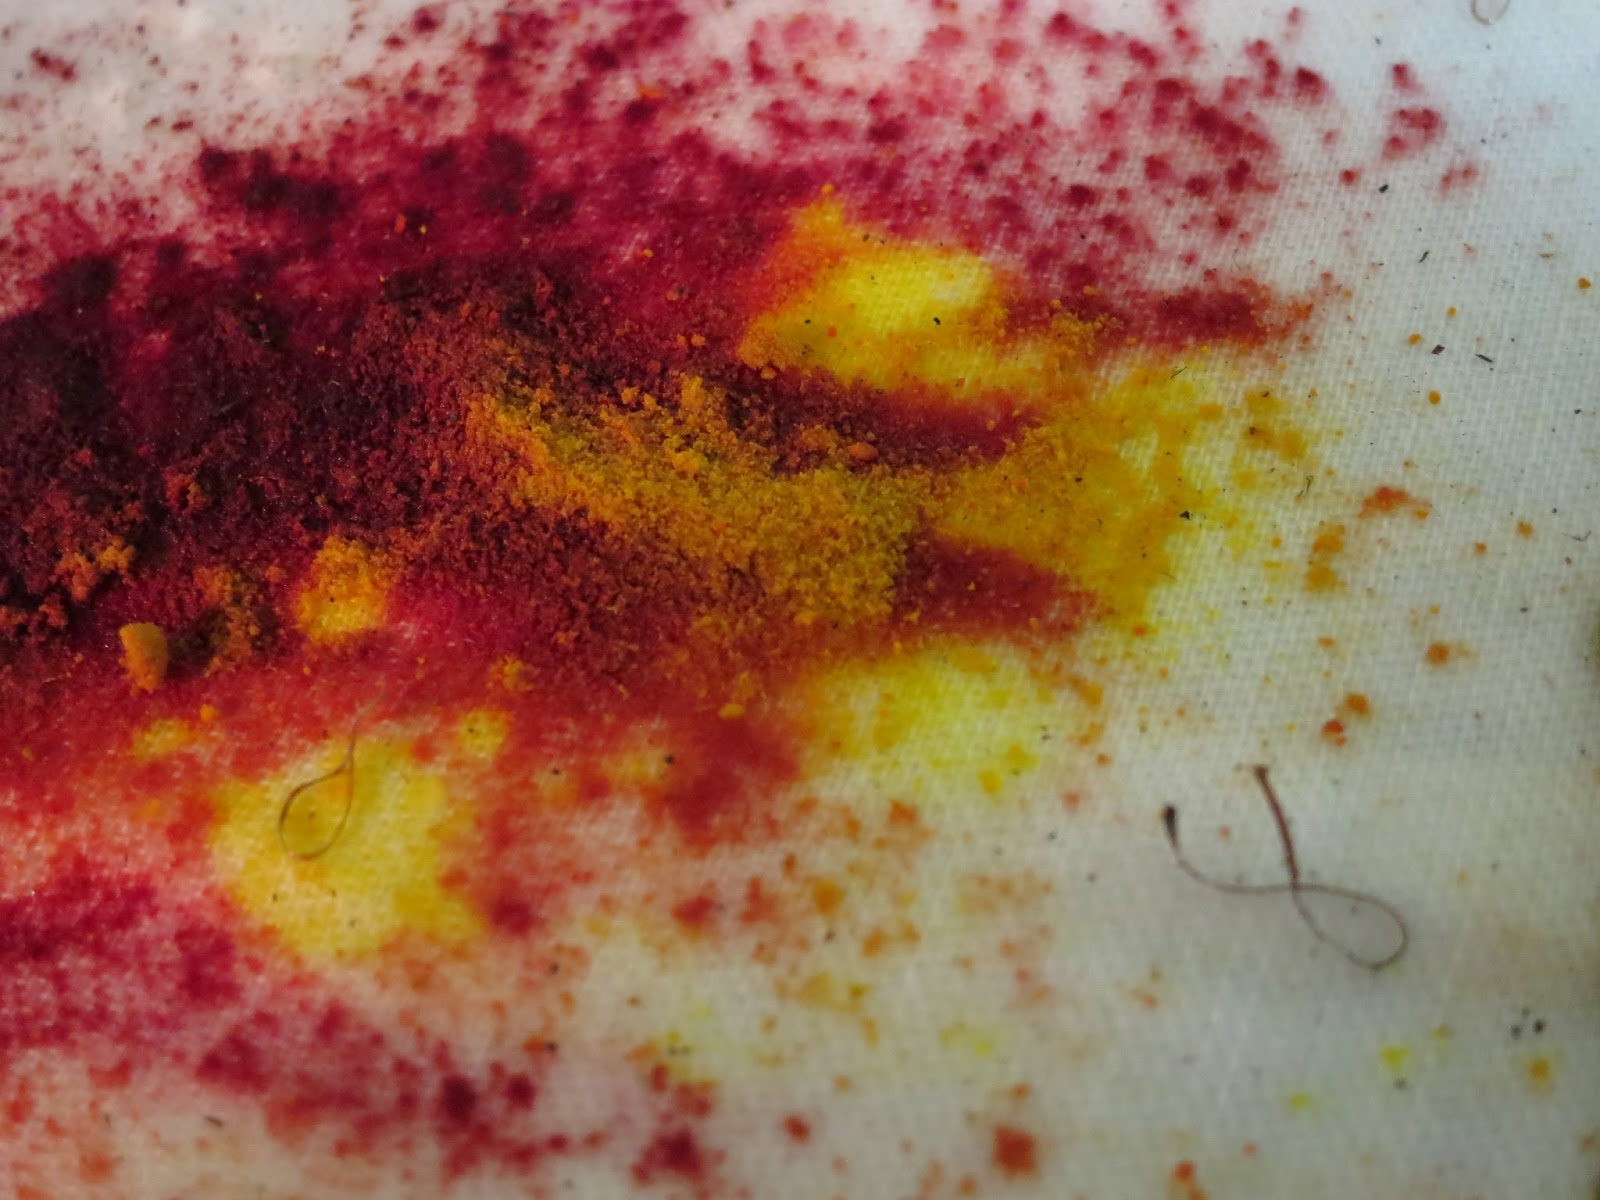
   interesting!  but that's not all!  i was doing another spice dye experiment and in this one i also was sprinkling spices and i used the washing soda and baking soda and the turmeric, i also used some salt and some rusted metal and decided to try spraying some diluted apple cider vinegar mix on the whole thing at the end.  WELL!  look here:


     where the apple cider vinegar hit the turmeric it turned BRIGHT yellow!  obviously turmeric is highly colour sensitive to pH!  so interesting! 
     i wonder why i have not heard about this more????  if anything it's a fun experiment!

Monday, 31 August 2015

hi how are you #3 - photo/art/zine

     hello hello!  i actually finished it a little while ago, but hi how are you? - #3 is done!


     what is it?  well!  it is a tiny little photo/artzine project made by me!  you can get one by asking nicely or sending me mail or, well, info is here.   they are all lovingly hand made/cut/stamped/etc... and there is a limited quantity.  hope to hear from you!

dystatic / po box 20083 / rpo beverly / edmonton, ab / canada / t5w 5e6

Sunday, 2 August 2015

morning glory!

    i was super super excited that my morning glory was going to bloom!  so excited!  i started some plants from seeds this year and i was not going to even try starting any flowers because i am not a great gardener, but we have this big container of old seeds (some are really really really old) and i was looking through it and there was a pack of blue morning glory seeds, so i thought i would try!  i love blue flowers!  i dont think i have actually ever seen any blue morning glories in person, just in pictures, i guess they are not a hugely popular plant around here.  (though i do have wild morning glories (a weed) growing, and i have encouraged them to grow up my deck, so pretty!)  ANYWAY!  i tried planting the seeds, thinking they would do nothing, and TA-DA!  they sprouted!  super quick!  and grew quite well!
     a few days ago a little swirly appendage started to get much bigger and i knew it was going to bloom!


     i was so pleased!  i was watching super close so as not to miss it because the flower only lasts for one day.  and then it unraveled!  it looked like this before i went to sleep (early in the morning, just after sunrise - my sleep schedule is not normal)  i knew that when i got up it would be open!


  AND! ... disappointment.


     it had rained during the night, and it had rained during the morning and the rain had damaged the blossom.  poor little pathetic flower.  BUT!  the blue is so pretty!  and the blossom is HUGE!  and i was still excited to see it.  + those little pokey things in the back are going to become blossoms in the future i do believe!

    here it is later in the day when it had dried out a bit.  ugh.  look what the weather had done to the poor thing.  i dont think it had even rained that hard really.  fragile things.


    by the end of the night it had shrived up into a candy striped little clump.  strange little flower.  i still managed to get a few pictures of the blueness though, or, well, in its more shriveled state it appears more purple really.


     the blossoms of the wild morning glories, which grow as weeds, last for more than 1 day, though i am not sure for exactly how long.  some decided to grow in my front yard this year so i encouraged them to grow up the front of my deck.  they are a pretty soft pink colour and the blossoms are only about 1.5 inches across, much smaller than the blue morning glory.


    and for good measure, a few other flower pictures i took around the same time as the morning glory.  i planted some sweet peas that i wanted to climb up things, which didnt, oh well.


     and some pansies!

Tuesday, 26 May 2015

pin*test - burning dandelion seed heads

     I have seen those pins on pinterest that show burning dandelions saying that when you set them on fire they burn purty colours.  I never really believed it, but i figured it would be fun to give it a try because it includes one of my favourite things, taking pictures of things on fire!  Yay!
     I was just thinking now that i could have taken a little video, i always forget about the video option on my camera.  (I really should start playing with that more often)  Instead i tested out the -high speed burst- photo option.  ..now, at the moment there is fire ban here, so i really did not want to be playing with fire too much outside, so instead i brought a couple of seed heads inside & did it in the kitchen sink.
     Here are the results:

(the first try took 14 shots & i am cutting out a few)


     here is another one that was smaller....


     i did see online another photo that someone did of burning a whole bunch, a little bouquet of them!  that might be neat.. but that might be more of an outdoor project and someone else holding them while i take the picture.  Maybe later when the fire ban is lifted.  i do not think there will ever be a shortage of dandelions during the summer!

     & here are just some more photos i took of dandelion seed heads, because they are pretty!


     hopefully i will do more posts soon!

Wednesday, 4 February 2015

water fireworks!

science experiment time!
     While looking around pinterest for info on density jars for my sister for her class i came across some links about oily fireworks!  I actually think i had run across them before, but this time i actually took a better look & thought i should definitely give this a try because it might give the opportunity for some nifty photos!
     So here is my how to & the results!  You only need a few supplies really, a jar, a bowl, a fork or something to stir with, some water, some oil & some food colouring!


      First you need to fill your jar full of water.  Now you need to put some oil in a little bowl (the internet says 2Tbsp) & add a few drops of food colouring.  The drops of food colouring will suspend in little spheres in the oil, its kinda cool!  So you need to break them up and mix em around with the fork or spoon or whatever you have.


     **These are some drops of food colouring in a little jar of oil, you can see how they are little balls!**

     Then you dump the oil & everything into the jar!  (I found that the food colouring likes to hang back and stay in the bowl while most of the oil pours out if you pour it super quick, so maybe use the fork or spoon to help get it all in there)  And when you do this little bits of the food colouring will start to drop down into the water creating lovely little swirly effects!


     It soon got pretty dark & there were just little bits of swirls at the bottom.


     The next day i decided to try again!  I had an idea, since i have lots of different colours of dye, i thought that maybe if i first put in just light colours, mainly yellows, oranges & red then do it again with blue type colours they might mix to make a purple-ish mix!
     So i started with these colours:


     & they did this:


     So, then i tried the next group of colours.  Oh!  first i salvaged the oil!  i just skimmed it off the top of the jar & got out as much as i could.  I ended up getting a little bit of the water as well, but that is ok! you don't need perfect oil for this experiment!  The little yellow blobs in here are the bits of water from the last try & the darker circles are the food colouring.


     & i dumped this mix into the jar with the already yellowish mixture!  it did this:


     & then it turned into a giant dark, scary mass!  & then little finger things came out the bottom of it!


     I was not totally satisfied with the results i got.  I didnt get the colourful swirly mix that i was hoping for.  I thought that maybe the reason was because i was that in the hope for more colour i was going a little crazy with the food colouring and putting way too much in there!  So i scooped off the oil again & dumped out the jar, got myself some clean water & started over again!  This time i decided to go easy on the food colouring, instead of putting in several drops of different colours i limited myself to 1 drop each of ..well, i think i put a drop of each colour i had, which is 8.  I also tried not mixing them up quite as much so that there were some larger blobs of colour in there with the little ones.


     & this is what i got!


     I was much more happy with these results!  I thought they were much prettier than the other ones!  It is a pretty neat experiment!  Fireworks in a jar!


     It doesn't last very long though, the above picture is 1min in & below is after only 3 min.  It is already a gunky green mess.  But you can always just scoop out the oil, get some more water & try again!


***

     Another experiment...
     This raining rainbows experiment, here is another link, i have seen plenty of pins for it.  I had just remembered about it, not read about it & thought it was just a jar of water, some shaving cream drop some drops of food colouring on it.  So.. i did that.  Well!  It did not work.  I was waiting for the food colouring to soak through the shaving cream & waiting & waiting.. blah.  So i left.  Now it is days later & i left it there, the bottom of the shaving cream is starting to dissolve into the water, the food colouring has spread out along the top, but nothing is going through.  Maybe this is super power dollarama shaving cream?  After actually reading the instructions online i see that they say that you are supposed to use water & food colouring, so i assume that is the issue.  Maybe i will give that a try & have pretty raining rainbow pictures another time!